
The upstairs hall bathroom in our house was in good shape – but had a ton of builder grade features. We could have just gut the bathroom and started over, but we decided to give it a refresh instead!
How We Updated the Bathroom
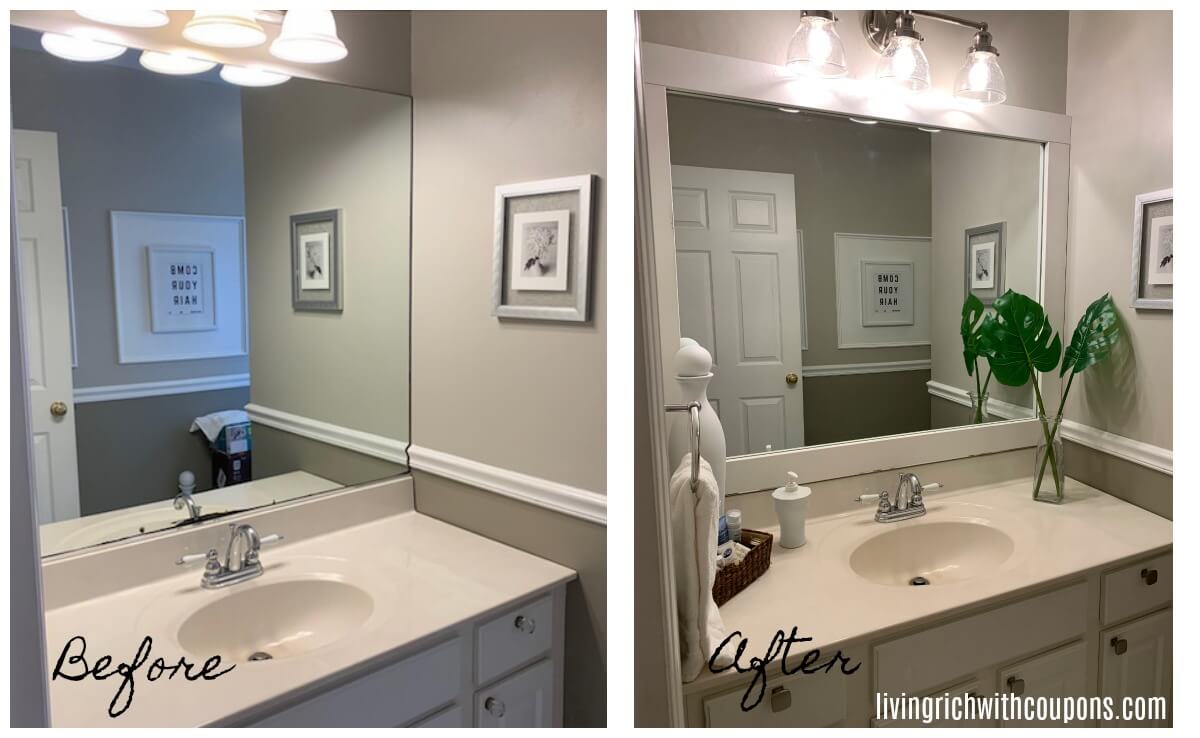
The bathroom has builder grade vanity, sink and faucet as well as that standard big mirror. While I would have loved to update all of that, I really didn’t want to put out the dollars. However the mirror was pitting along the bottom and just looked terrible.
My initial thought was to take down the mirror and put up a pretty new mirror however, having done tons of remolding projects, I knew that taking that mirror down was just going to open up a can of worms.
So, we decided to frame the mirror to cover the pitting and give it a more custom look. We also added a new faucet, knobs, and light fixtures! And wa-la! A beautiful “new” bathroom!
Cost Breakdown:
- New Light Fixture – $90 (purchased from Lowes)
- New Faucet – $40 (purchased from Home Depot)
- New Knobs – $18 (purchased from Home Depot)
- Updated Mirror – $36 (wood and glue purchased from Lowes)
Total Cost = $184
What You’ll Need to Update the Mirror:
How to Update the Mirror:
1. Cut the MDF Wood to size of mirror
First measure the top and bottom pieces and cut the MDF to size. Then measure and cut the side pieces.
Note: If your bathroom is highly used I’d use another type of wood. MDF isn’t the best with water.
2. Paint Wood
Select your color and paint the wood before hand. Make sure you paint the back of the wood that you are adhering to the mirror as well. This way, when you see the reflection of the back of the wood, you see it painted and not the raw wood.
3. Use Liquid Nails to adhere wood to mirror
To adhere the wood to the mirror, simple run a small amount of liquid nails to the back of the wood. Make sure to keep the liquid nails to the center of the wood so it doesn’t squirt out the sides when you press it to the mirror.
Then simply place the wood where you want it, hold it for about 30 seconds to make sure it adheres well and that’s it.
Note: Start with the bottom piece of wood first, then add the sides, and then add the top. This makes it easiest to get a nice snug fit.