
For the last seven years, since we moved into our home, I have struggled to decorate this wall in our kitchen. I found myself filling it up with these big, clunky, wall hangings in an effort to bring some personality to the wall. Nothing ever seemed right and I would change it all the time in my constant attempt to make it work.
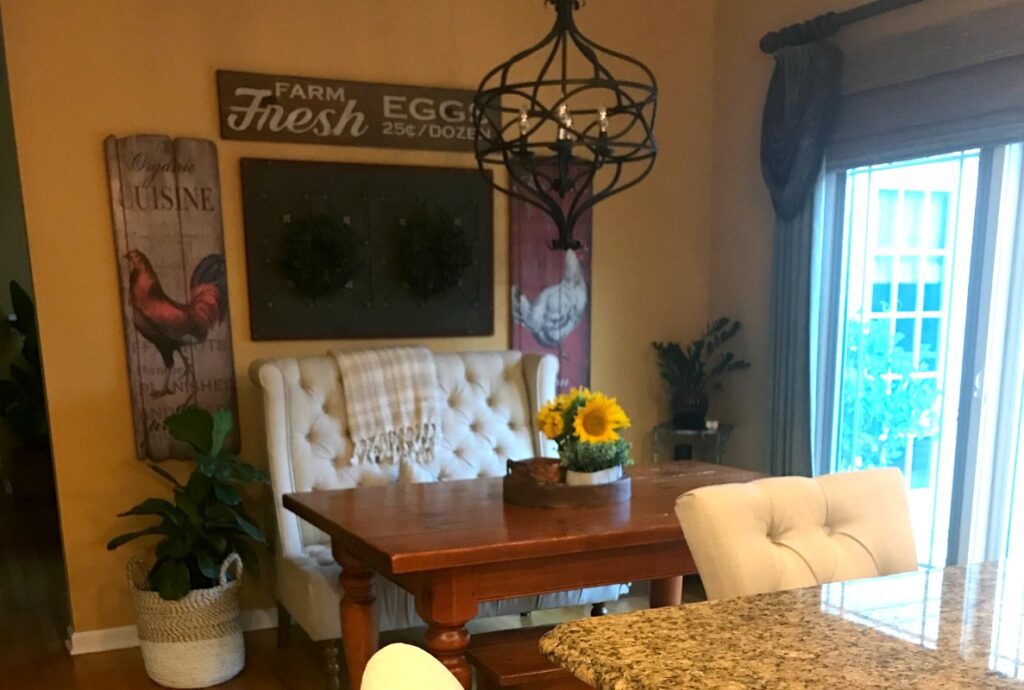
As you can see from above, it was a mishmash of stuff that just looked too busy and cluttered. But, it definitely needed something there to make a statement.
For years, I had my eye on board and batten walls and knew this was the perfect place for it. However, I thought it was out of our DIY level. And, paying someone to do the work for us was out of the question as the cost was well over $1000.
So, I started watching YouTube videos to see if I could learn the ins and outs of installing a board and batten wall. After watching a few videos, I realized it was much easier than I thought and knew we could do it.
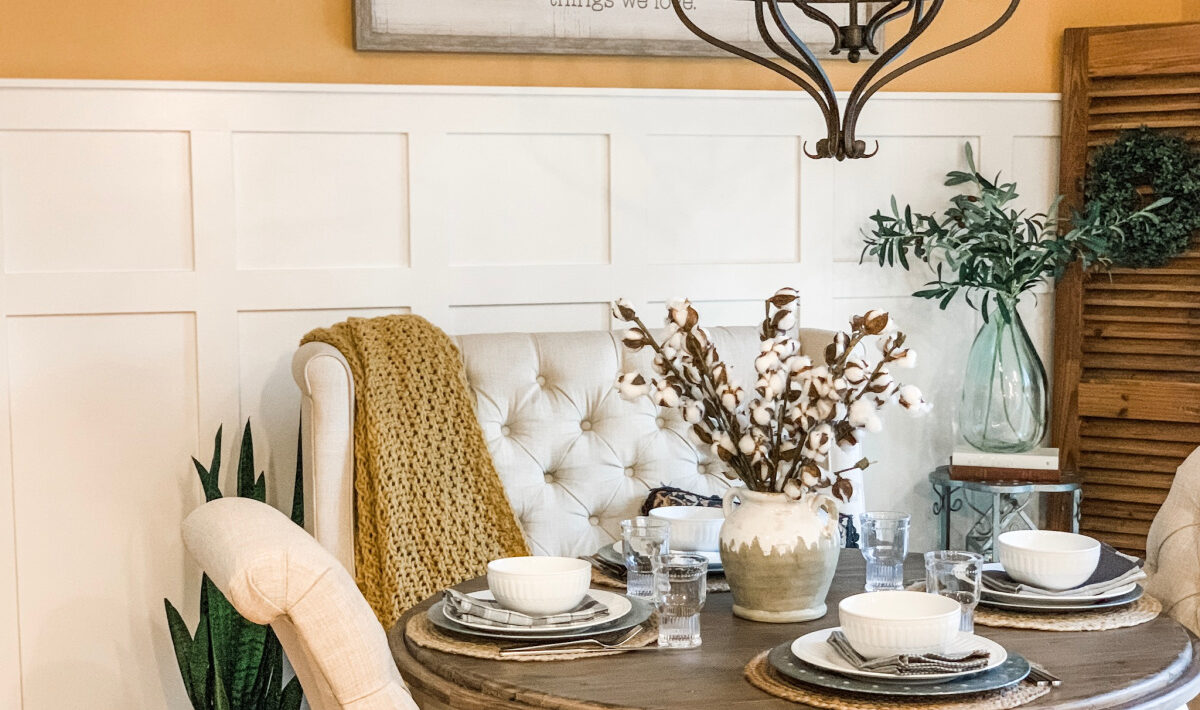
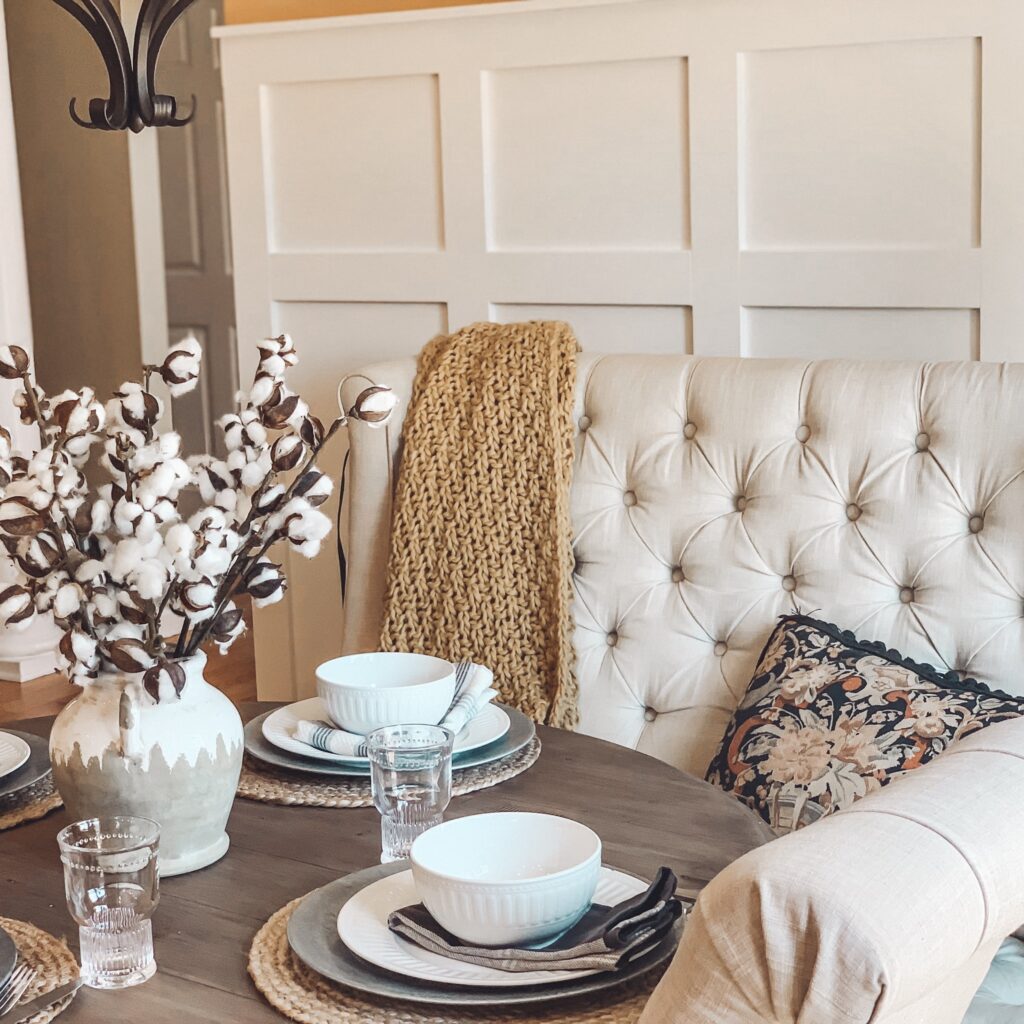
The project took us just one weekend and cost us under $150 for the materials which is so much better than $1000. We are pretty proud of this wall and are looking for more places to install it.
What You’ll Need to Make Your Board and Batten Wall
- 1×4 Primed MDF wood (Actual: 0.656-in x 3.59-in)
- 1×2 Primed MDF for the ledge (Actual: 0.656-in x 1.5-in )
- Paint
- Wood Putty
- Caulk
- Liquid Nails
- Finishing Nails

How to Install a Board and Batten Wall
To attach the wood, we simply used liquid nails and finishing nails. Also, if your walls have a texture to them, you may want to put up MDF board over your existing walls for a smoother look. Just be sure your seams of the MDF board end up behind the vertical boards so you don’t have seams showing.
Instructions:
- Install Bottom Horizontal Board – Measure from one end of the wall to the other to get your cut measurement. Cut your 3.5″ wide piece of MDF to the length you need. Apply a small amount of liquid nails to the back of the board and place the board just above your existing floor molding if you can. Our floor molding was pretty basic so we were able to get away with adding the new molding right above the floor molding. Place a level on it to be sure it’s straight. Then nail in place.
- Install Top Horizontal Board – Use the 3.5″ wide MDF for this piece as well. This piece will sit at the height of your board and batten wall. The overall height of our wall is 66″ from the floor. We placed the top of the horizontal piece at 65 1/2″ high leaving about a 1/2″ for the ledge. Level than glue and nail in place.
- Install Side Vertical Boards – Use 3.5″ wide MDF for these pieces. These will be installed at the ends between the top and bottom pieces you just installed. They should fit nice and snug in between the bottom and top horizontal boards. Cut the 3.5″ wide MDF to the measured lengths. Make sure they are straight by using a level and than glue and nail in place.
- Plan Out your Interior Vertical Boards – This was, IMO, the hardest part as you have to make sure you space out your interior vertical boards evenly and also work around any outlets. Ours are 15 1/2″ apart.
- Install Vertical boards – Once you have your spacing planned, measure for each vertical piece (remember, each piece may be sightly different so don’t cut them all the same length). They should fit nice and snug in between the bottom and top horizontal boards. Make sure they are straight by using a level and than glue and nail in place
- Install Horizontal Interior Boards – The next step is optional and can be exactly like we did it (about 1/3 of the way down), you can also do more boxes if you’d like or you can omit these altogether and just have vertical boards. You’re the boss applesauce. Our horizontal boards are 12″ from the bottom of the top board to the top of the horizontal interior board. We cut 2-12″ pieces of wood and placed them under the top board to use them as a guide. This way we were able to get an exact placement of each horizontal board. Glue and nail each one in place.
- Install Top Ledge – We decided to add a little ledge on top. We simply used a 0.656-in x 1.5-in MDF board and attached it right to the top of the top horizontal board. It gave it a nice finished look.
- Fill the nail holes – Use wood putty to fill nail holes and the seams of the wood (ie, where they transition from one piece of wood to another)
- Lightly sand – once the putty is dry, lightly sand the wood down
- Caulk – we caulked every place the wood came in contact with the wall. Doing this gives it a completely finished look once it’s painted.
- PAINT – paint your newly installed wood and the wall. And you’re done! Great job!
Resources:
- Paint Color of Board and Batten: Dove White from Benjamin Moore
- Wall Paint: Dorsett Gold from Benjamin Moore
- Picture: Kirklands
- Table: Wayfair
- Chairs: Joss & main
- Bench: World Market (discontinued)
- Vase and flowers: Hobby Lobby
- Plates: Macys
- Glasses: Hearth & Hand by Magnolia at Target
- Napkins: Homegoods
- Chargers and placemats: Michaels clearance sale
- Blanket: Target (last year’s Fall clearance)