

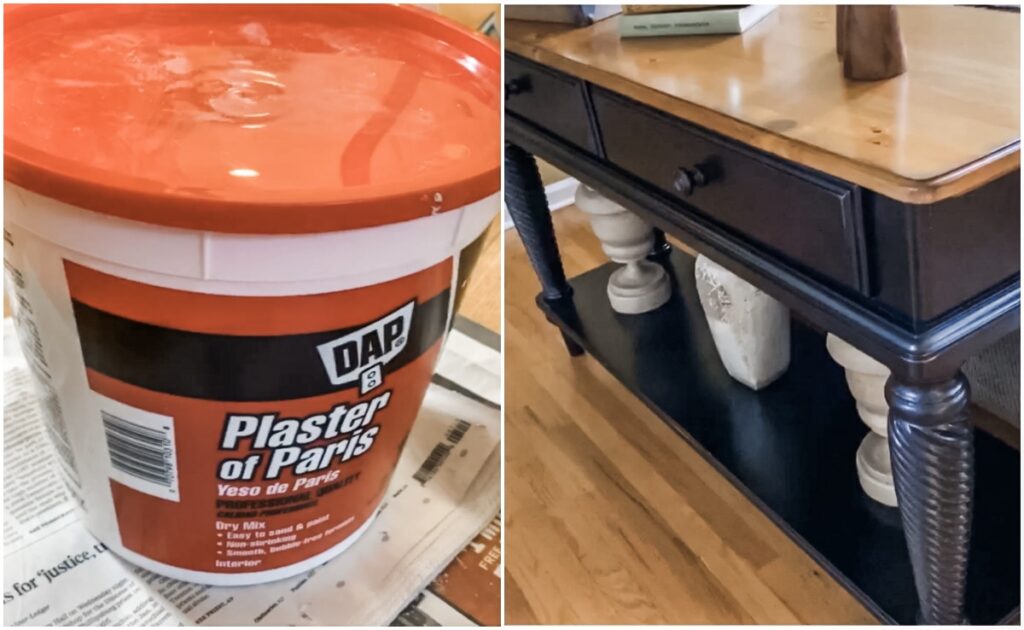
When I was waiting on my new family room furniture to arrive, I knew that the console table I had behind my existing, deep green, love seat wasn’t going to look great for my new, creamed colored, sectional. However, the console table is a great piece….the perfect size, height and the wood tone of the top was the perfect color. The issue was the black painted bottom. So, decided to give it a makeover and paint the bottom. That’s when I turned to chalk paint.
What is Chalk Paint?
Chalk paint has additives in it that give it a chalky appearance and feel when painted. The beauty of chalk paint is that it can be easily distressed giving it a nice, aged, appearance. It can be used on so many different surfaces including furniture, cabinets, metal, glass and even better quality plastics. And, the best part is, you don’t need to sand first. That’s probably my favorite part.
Chalk paint, when it’s first painted, does have a chalky, flat appearance but once you apply a wax it gives it a nice finish.
DIY Chalk Paint
I decided to actually make the chalk paint myself for a couple of reasons. The first is that chalk paint can be expensive and I’m always trying to cut costs on projects wherever I can. The second reason is that I wanted a specific color. While there are a nice selection of chalk paint colors, between all the different brands out there, you are still limited to the colors they have. So, by making it myself, I was able to use the exact color I wanted of my favorite brand of paint and turn it into Chalk Paint. Bonus on this project…I already had the color I wanted to use on hand which was even more of a savings.
Here is the mixture:
- 1 Part Plaster of Paris
- 1 Part Water
- 3 Parts Paint
Add the ingredients above in a container suitable for paint and stir gently to mix well.
How to Chalk Paint Furniture
Painting with chalk paint is simple. First, as I mentioned above, you don’t need to sand. However, be sure to clean down the furniture with your favorite all purpose cleaner.
Here is how to paint a piece of furniture with chalk paint:
- Apply the paint with a regular paint brush. Note that your first coat will look more transparent. Usually you need at least 2 coats to get full coverage but that will depend on what you are trying to cover. It took 3 coats of Chalk Paint to go over the existing black.
- Next gently distressed the piece where it would normally distress, at the edges, corners, etc.
- Next put a coat of regular wood wax over top. Using the wood wax before you add an antique glaze (if you are using one) helps you to have more control of how much glaze you want to show. Without suing the wax first, the glaze will quickly and seeps into the chalk paint giving you little time to wipe off what you want.
- Lastly, if you are using it, apply the antique glaze. You can apply it with a brush or a rag. Then gently wiped it until you had the look you want!
Here are the products I used for this project:
- Paint: Benjamin Moore Color Stone CW-60
- Plaster of Paris
- Wood Wax: SC Johnson Paste Wax
- Antique Glaze: Rustoleum Chalked Aged Glaze
- Knobs: HobbyLobby
Total Cost of Entire Project
I spent about $25 on this project because I had the furniture and the paint color on hand! The only thing I had to buy was the Plaster of Paris and the Aged Glaze.
What have you painted with chalk paint?