
As many of you know, my husband and I just bought our first home. The home is a fixer upper as it had some smoke damage and very outdated flooring and bathrooms.
Before we moved in we needed to do some things to make it livable! You can view our, before the demo day, video that we shared on our Instagram account.
To us (as first time home owners), this process was going to be simple. Tear up floors, paint and clean. NBD. NOT! As I’m quickly learning, there are always surprised and things take longer than you would originally think – but thats the joy of making a home your own!
Here is what we’ve done in Phase 1 of Renovation:
- Tear Up all the floors to put in one floor throughout the entire first floor (there were 4!)
- Clean the smoke damage and, well, the grime and dirt (yuk!)
- Replace some appliances
- Repair a ceiling
Here is a breakdown of exactly what we have done so far:
Tear Up Carpets
Seems simple like a simple job right? It did to me, but it does take some time! The tools we used to remove carpets are basically just a utility carpet knife. This is used to cut the carpet into smaller, more manageable pieces.
Once the carpet is removed, you have to also remove the tack strips. These are the thin pieces of wood, with tons of tiny nails that is used to adhere the carpeting to your floor. To remove them we just used a small crowbar and hammer. Make sure to wear glove, those nails are sharp.
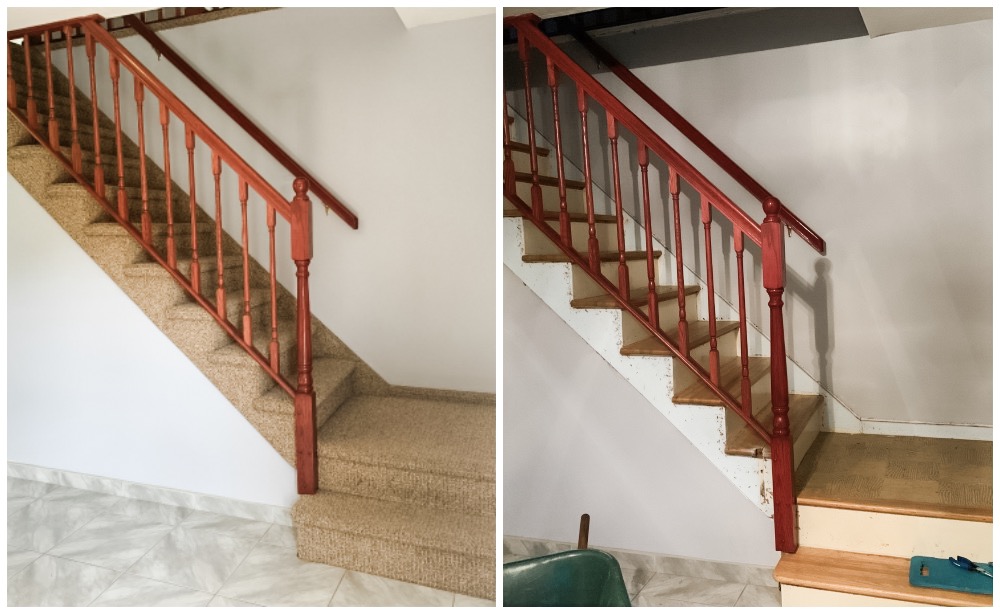
Tearing up carpets on the stairs is a whole other task! They staple the heck out of the stairs! So once you rip up carpet – you have to take out each and every staple out of the wood! To remove the staples, we simply used long nose or needle nose plier for that task.
The discovery of the oak treads under the carpeting was exciting. While it’s a lot of work to remove the carpeting, I know it’s going to look great once we stain and paint them. I can’t wait to show you guys that project!
Tearing Up Tile
This was probably the quickest job. The tile was in the front foyer and hallway and needed to be removed so we could run the same flooring throughout the downstairs.
To get up the tile we use a chisel and a hammer and a lot of elbow grease. It only took at few hours and it was finished! Make sure you are wearing goggles if you do a job like this!
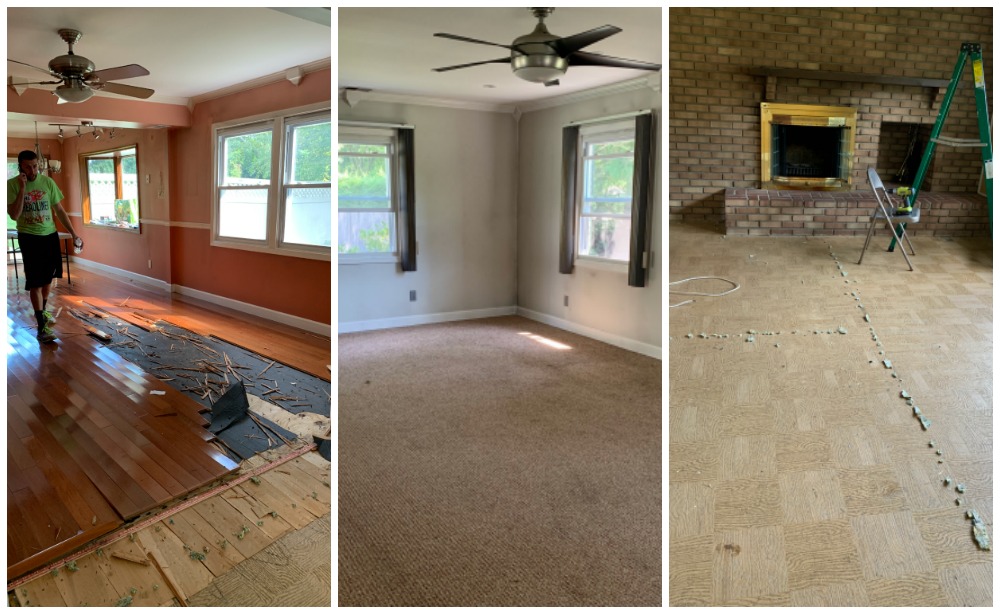
Tearing Up Hardwood Floor
I know you’re probably thinking – you’re tearing up hardwood flooring! But guys – it was ugly and quite honestly, not a great quality floor at all. It wasn’t the type of flooring we could strip and refinish. Plus, we had an issue with different flooring heights, which I’ll talk about in a bit.
This wound up being the biggest project, by far! To remove the hardwood flooring we use a big crowbar, hammer and rubber mallet. There were tons of nails that had to be removed as well. It took four of us 2 full days to get it removed.
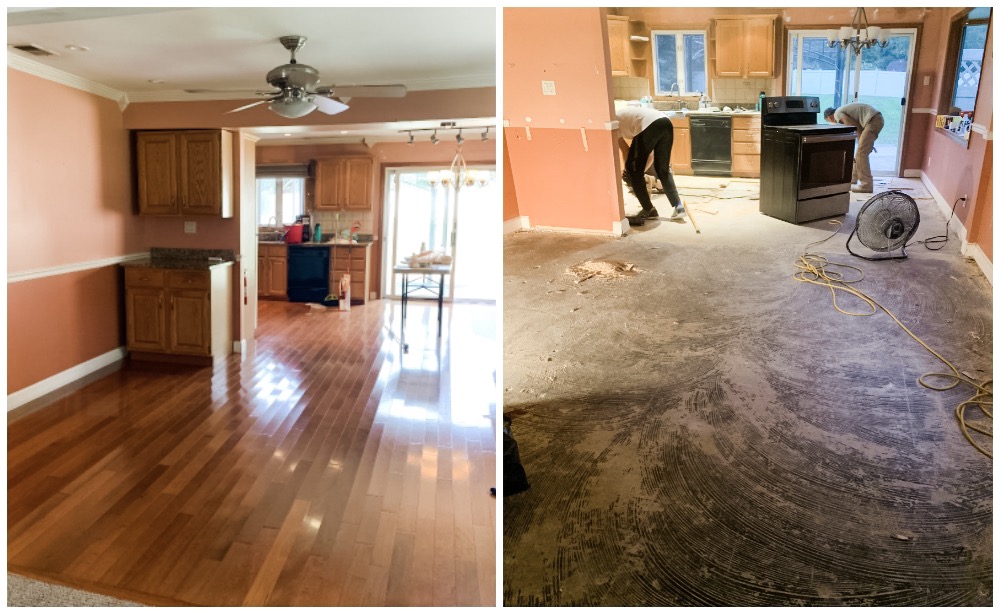
Once the wood was removed we were faced with another issue….removing plywood that was nailed into concrete.
The plywood was what I was referring to above regarding different flooring heights. You see, we didn’t know, before we removed the carpeting, that the dining room and kitchen (the rooms with the hardwood flooring) was higher than the carpeted rooms. They had “ramped up” the carpeting to meet with the hardwood flooring. That wouldn’t work for our new floor we were laying down throughout the entire first floor. We needed a completely flat surface.
We tried to get the plywood up ourselves, but we couldn’t to it! It was nailed, with a big nail gun, through the plywood into the concrete. Initially, we thought about adding plywood throughout the rest of the house – but then the flooring would end up being higher than our front door causing us to have to remove the front door and lift it up higher. After reviewing the costs of the different options, we decided to call in a professional and remove the plywood.
He took the plywood up in about 3 hours! It saved us time and it actually wasn’t that expensive. We were able to cut back on the cost by working along side him (not all contractors will go for that though) and we cleaned up ourselves. In the end, taking up the plywood was the best and least expensive option.
Cleaning Up from Smoke Damage
Another surprise was just how bad the smoke damage really was. The walls, ceilings, window frames, cabinets, closets and bathrooms, in the entire house all had black soot on them. We tried, with no success, to do the clean up ourselves but we ended up just smearing it around!
For this, we did have to call in the professionals. It was important it was cleaned properly, not just for our safety but so that we could paint without smearing it into the paint. That wouldn’t have been good.
We wound up using Servpro which handles restoration services after fire and water damage. They had a crew of about 3 people that worked the entire day. What a difference it made.
Now that everything is cleaned and removed we are officially done with Phase 1 of Renovation! And, now it’s onto the good stuff…
Next up on our list in Phase 2 is:
- Prepping the entire house to paint (lots and lots of spackling)
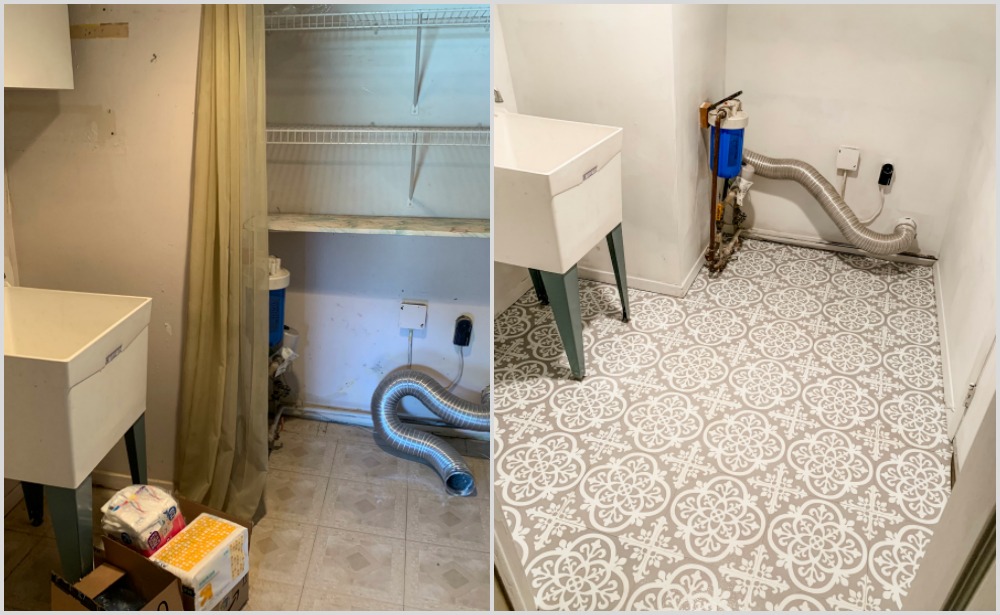
- Put in a vanity/toilet in half bath
- Put in Vanity in Master Bath
- Painting the ENTIRE HOUSE
- Putting down vinyl or laminate floors
- Putting down Carpet (upstairs)
- Sanding and staining the stairs
- Painting the stair railing
- Get a plumber to put in stop valves on all of our sinks (there were none)
- Get the furnace ready for winter (you should always have it checked before you turn it on for the first time – especially if your in a new home!)
Once Phase 2 is complete – we can actually move in and get settled and continue fixing things up how we want them to be! I have a list a mile long!
Follow us on our Instagram with some play by play from me!